
Christmas Jello Balls are a fun and festive treat that adds color and joy to any holiday gathering. They’re easy to make, deliciously fruity, and perfect for both kids and adults. These delightful bites are not only a tasty dessert but also a great way to bring some creativity into your holiday celebrations!
How to Make Christmas Jello Balls
Ingredients:
- 1 cup Jello (various flavors)
- 1 cup boiling water
- 1 cup Greek yogurt
- 1 cup shredded coconut
- 1 tablespoon unflavored gelatin
Directions:
- In a bowl, dissolve the Jello in the boiling water. Stir until it is completely dissolved.
- Allow the mixture to cool slightly. Then, stir in the Greek yogurt until well combined.
- Sprinkle the unflavored gelatin over the mixture and stir to combine.
- Cover the mixture and refrigerate until it starts to set, about 2 hours.
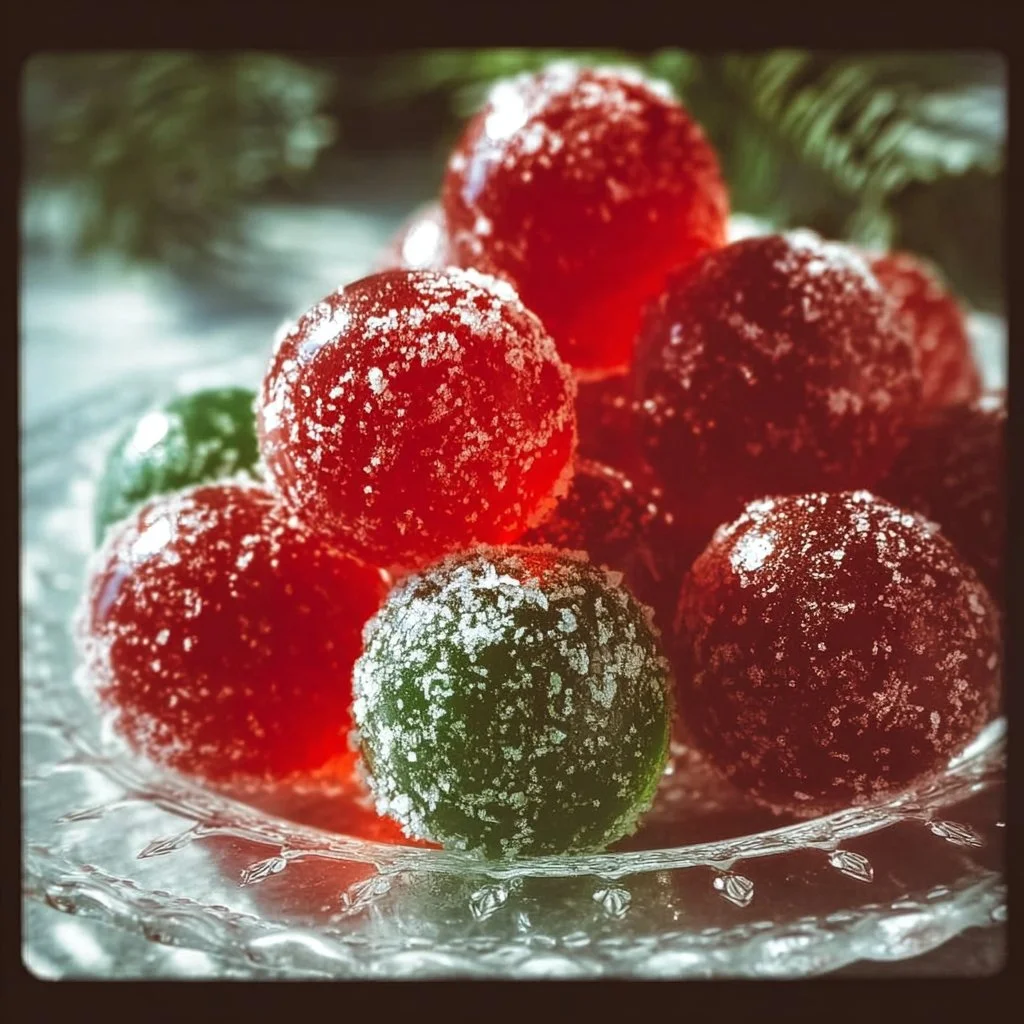
- Once the mixture is slightly set, use a melon baller or a spoon to scoop out small balls.
- Roll the balls in shredded coconut to coat.
- Place the Jello balls on a serving platter and refrigerate until ready to serve.
How to Serve Christmas Jello Balls
Serve these Jello balls chilled on a festive platter. They can be a fun addition to any dessert table or a sweet treat for holiday parties. You can garnish them with extra coconut or slice of fruit for an added touch.
How to Store Christmas Jello Balls
Keep any leftover Jello balls in an airtight container in the refrigerator. They will stay good for about 3 to 4 days. Just make sure to keep them chilled until serving!
Tips to Make Christmas Jello Balls
- Use different flavors of Jello for a colorful display.
- Experiment with types of yogurt, like vanilla or flavored ones, for a twist.
- If you want a little extra sweetness, mix in a tablespoon of honey or maple syrup.
Variation
You can create a layered effect by letting each layer of Jello set before adding the next one. This way, you can have beautiful, colorful stripes in each Jello ball.
FAQs
Can I use sugar-free Jello?
Yes! Sugar-free Jello works just as well for making Jello balls.
Can I use a different coating instead of coconut?
Absolutely! You can roll them in crushed nuts, sprinkles, or even graham cracker crumbs for a tasty variation.
How long do they take to set?
They typically take about 2 hours to start setting but may require more time if made in larger batches or shaped differently.
Christmas Jello Balls
Ingredients
Equipment
Method
- Dissolve the red gelatin mix in 1 cup of hot water, then stir in 1/2 cup of cold water. Pour a thin layer into molds and chill until just set.
- In a separate bowl, dissolve 1 envelope of unflavored gelatin in 1/2 cup of hot water, then stir in the sweetened condensed milk and 1/2 cup of cold water. Pour a thin layer over the set red gelatin and chill.
- Dissolve the green gelatin mix in 1 cup of hot water, then stir in 1/2 cup of cold water. Pour a thin layer over the set milk layer and chill.
- Repeat the layering process with the remaining gelatin mixtures, ensuring each layer is firm before adding the next. Once all layers are complete, chill the molds for at least 4 hours or overnight.
- Carefully unmold the Jello balls and arrange them on a serving platter. Serve chilled for a festive holiday treat.